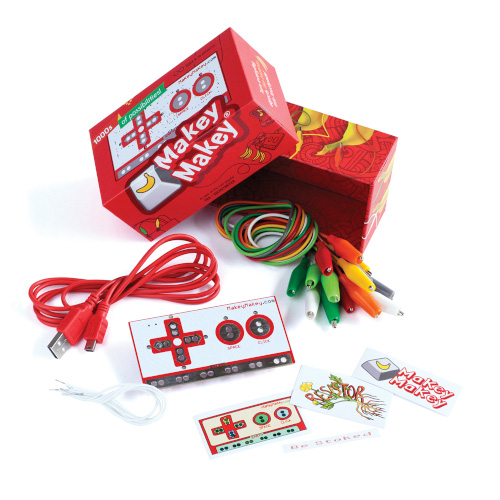
 A Makey Makey is a wacky invention which allows users to connect a circuit board to any object and change their abilities. Want to play the piano using fruit? No problem! Fancy using a stuffed toy to browse the internet? Sure thing! The Makey Makey can allow you to give it these functions along with many others and it can do this very easily.
By using a circuit board and a USB cable, the toy uses closed-loop electrical signals. With this, the computer can either receive a keyboard stroke or mouse click signal. This means that literally, anything can be used to send the signal.
Makey Makey – An Invention Kit for Everyone
It was originally created to be an academic and artistic tool in 2010 by Jay Silver and Eric Rosenbaum through a Kickstarter campaign. They went through numerous prototypes until they finalised their design in 2012.

The weWalk Cane
The weWalk is a high-tech cane that can help visually impaired people to safely make their way around. It comes with speakers, the ability to use with a smartphone and censors which tell the user when they’re approaching obstructions. The weWalk can also be paired with Google Maps and includes a voice assistant which can tell the user where to go. It was created around an open-end platform which allows third-parties to add their own functions as they see fit. As an added bonus, the creators wish to pair it with transportation services to improve its already excellent facilities.

This a superb invention which can be extremely beneficial to the visually impaired. Add to that the fact that it is open-ended which leaves it with numerous possibilities for improvement in the future.
Link: https://www.youtube.com/watch?v=EVXWHt7C5NY
Tilt 5 AR Glasses
The Tilt 5 AR glasses is a holographic gaming device that will revolutionise how we play board games forever. They combine modern gaming console graphics with tabletop games which gives a unique experience for users.

They are made with polarized lenses, two cameras and HD micro projectors. They project 3D images from a wired device, such as a laptop or smartphone, to a retroreflective surface, which then bounce the image back to your eyes. They are other options on the market for consumers like HoloLens and Magic Leap but these are priced at thousands of dollars whereas the Tilt 5 system is a few hundred.
The Tilt 5 glasses are a superb product with huge potential for advancement in options in gaming and other sectors.
Link: https://www.youtube.com/watch?v=fZ9a78USRIk
STATsports Apex Athletic Tracker
STATSports new ‘Apex’ is an athlete performance-tracking device using the latest technologies currently available. By using a powerful processor, Apex can calculate a large number of metrics, such as distance covered and speed, in real-time which allows precise live data to be stored to the device and viewed by the user. The technology that is being utilised here is unlike any being used by competitors.

Perhaps the biggest point to make to show just how far ahead of its competition it is is the fact that over half the teams competing at the Rugby World Cup are currently using it.
Link: https://www.youtube.com/watch?v=e4zJyBC2ac8
NFC Ring Password Helper
This helpful little wearable allows you to log on to your PC or workstation without the need to enter a password but also without losing any security functions. You simply wave your hand over your desk or table and that’s it. You’re logged in!

It’s extremely easy to set up. All that is required is an Arduino Leonardo, an Adafruit NFC shield and a simple soldering tool. When you have the basics, you’ll need to load sample Arduino code to read and recognise your NFC rings unique tag. Place the circuit reader under your desk and you’re good to go.
This a really simple and clever way to erase the need to type out lengthy passwords every time you return to your desk.
Arduino Tutorials
Blink
For the blink tutorial, I started by setting up the LED as displayed in the diagram. I did not have to change the number for the serial port as shown in the diagram. I then copied the code from the Arduino tutorial page online in the Arduino app. I verified to ensure there were no errors and then uploaded.
In the example code, we used the constant LED_BUILTIN which allows for easier adjustments to the LED. If we change the delay from 1000 to 100 in LED_BUILTIN, HIGH and LED_BUILTIN, LOW, we can change the LED from blinking slowly to quickly.
Pushbutton
The pushbutton is a component that connects two points in a circuit when you press it. For this tutorial, we want the LED to turn on when we press a button.
I connected three wires to the Arduino board. The first of which goes through a resistor to the 5v supply. The second goes from the matching leg of the button to ground (GND) and the final wire links to a digital I/o pin.
Digital Read Serial
I started by connecting three wires to the board. I didn’t follow the colour guidelines of said wires as this seemed unimportant. The first two are to give access to the 5v supply and GND. The third wire goes from digital pin two to one leg of the pushbutton. In the same leg, we will place the resistor to connect to GND. The 5v supply will connect to the other leg of the button. Here, we want to show 0 when the button is open and to show 1 when the button is closed.
Physical Pixel
Here, we want to create a digital button that will affect a physical LED attached to my Arduino. To start, I placed the long leg of the LED into pin 13 and the shorter leg into GND.
Next, in my Arduino app, I chose “physical pixel” to find the correct sketch. This contains the Arduino and processing code we need to make our digital button work correctly.
After I set the code up correctly, I clicked the run button and a window appeared showing a dark coloured square. This is our digital button that will activate the LED in our Arduino when we put our mouse pointer over it.
Fade
For this, I connected the longer leg of LED to pin 9 of my board with a resistor. The shorter leg of the LED was placed into GND.
In the code, I simply set pin 9 to be my ledPin. There were no other adjustments needed within this code. I just needed to set the PWM value from zero to 255 or in simpler terms, fully off to fully on and then loop this effect to continue indefinitely.
Extra tutorial
Knightrider light effect
For our choice of tutorials, I chose to do a Knightrider effect with several LEDs. I followed this (https://www.youtube.com/watch?v=c4M-GAS4cWE) this tutorial on youtube to achieve it.
My first attempt did not work correctly. This is because this particular tutorial had done it in an unusual way. I ended up with a strange LED blinking pattern which was not the desired effect.
It turned out to be quite a simple fix. I swapped the positions of the short and long legs of the LEDs and after this, it worked perfectly.
Endless runner game
We were required to make a one-button game controller using a mouse input. We also needed to incorporate our own graphics/images for our character and platform.
I started by downloading the folder containing all elements of the game. I then replaced the images in the folder with two of my own choosing for the character and platform. I found my images on google search and then edited them in Adobe Photoshop. Next, I set up the Arduino, wires and button. I used the inputs on the board with the wires from the Arduino kit and connected one to a mouse button input, and the other wire to earth. After testing, I found the button to work perfectly.
Arduino and Processing Visualisation project
For this aspect of the project, I decided to make a light sensor. I would need to use the breadboard circuit, Arduino and processing to get this to work properly.
In the video below, you can see as light is blocked from hitting the sensor, the output is changing on the monitor.
In the second video, you can see I have changed the background colour and made the line thicker as it rotates showing the light changes.